The Portal is your Page Vault home base. In the portal you can:
- Manage your account
- View, organize and download your captures
- Access the Batch capture tool (if your firm subscribes to access)
How to Access the Portal
To access the Portal, navigate to portal.page-vault.com. Log in with your Page Vault credentials, the same credentials you use to access Capture Mode.
Managing your Captures
Viewing Captures
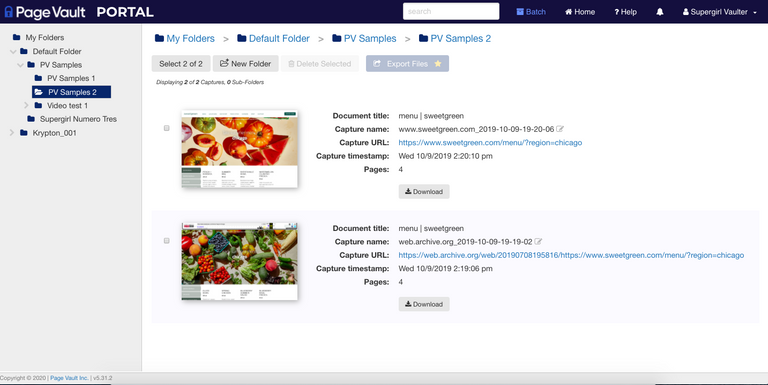
In the Portal, you’ll see your folder structure displayed on the left-hand side. Select the folder you’d like to view, and a summary of the folders and captures contained in that folder will load with a summary of the capture’s basic metadata to the right.
To see a full preview of a single capture, click on the thumbnail of the capture—that will take you to the Capture Detail page. On the Capture Detail page, you can scroll down to view a rendering of the capture. From this page, you can also edit the notes associated with the capture.
Moving captures
You can move captures by selecting checkboxes within a folder and using the “move selected” button, or you can drag and drop items.
- Click the box to select any captures that you would like to move, or use the “select # of #” button to select all captures visibly.

- Click the “Move Selected” button and select the folder you would like to move the captures to (you can also create folders in this dialog box). Click “OK” to begin the migration process.
Managing your Folders
Adding folders
- Navigate to the folder that you would like to create a new folder within. If you’d like a top-level folder, click on “My Folders” in the left folder navigation.
- Click on “New Folder”, type in a name for the folder, and click enter to save.
Moving folders
In either the left folder navigation or the folder contents area, click and hold the folder and drag it over to the new folder location. You will see as you hover over the folder that the folder becomes highlighted.
Rename a folder
In the folder viewing pane, locate your folder, and click on the pen and paper icon next to the folder name.

Folder Viewing Options

Thumbnail view (default)
The thumbnail view is our default folder view. The most recently taken capture will be at the top. You cannot sort captures in this view; it is most convenient when trying to see the capture thumbnail.
Table view
You can also view your captures in a table form. The table has a smaller thumbnail, but allows you to sort captures based on the metadata fields like capture URL or document title.