Facebook:
Using Scrape
- Open the Facebook profile you want a scrape for in your Page Vault Browser
- Click the red Expand button
- Select the Post by Post Capture type
- Select the “Request Scrape” button – this will send a request to our team who will follow up with the scrape via email once it is complete
- Once you have the scrape, Click the red Expand button again
- Under the Standard capture type, select “Bulk Capture a List of Post URLs” and click the blue box to open the pop-up
- Paste your desired URLs
- Click OK and then Expand and Capture!
Using Filters
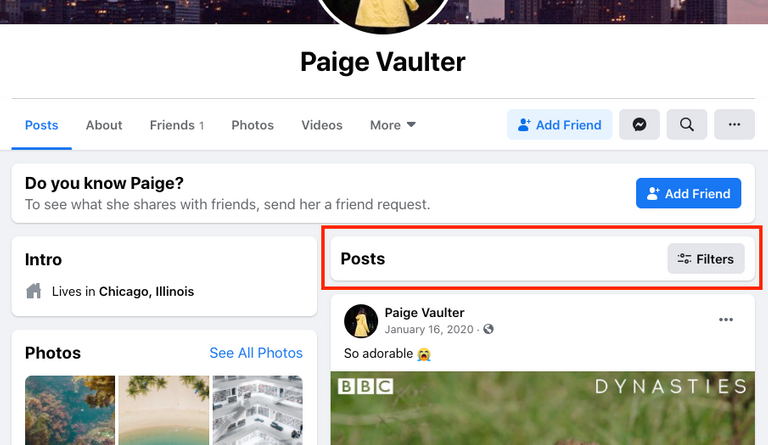
On a Facebook profile, the first post in the Facebook profile, you should see a “Posts: Filters” option.
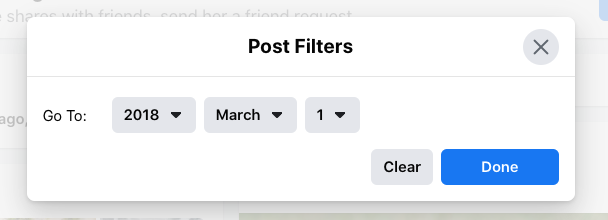
Click the filters button and enter the date you would like the capture to start.
This will bring the posts from that date up to the top of the profile. You can then click the Expand button, to capture from this date back to the beginning of the profile!
You can lower the pixel limit before starting the capture to capture less content.
Instagram:
- Navigate to the profile you want to capture in your Page Vault Browser
- Click the red Expand button
- Select “Get post URLs and email to”
- Click Expand! Our tool will go through the profile and generate a scrape that will be automatically sent to your email
- Once complete, on the profile navigate to the post where you want the capture to start and copy the URL
- In the scrape, use CTRL+F to find that URL
- Repeat steps 5 & 6 to find the URL for the post where you want the capture to end
- Copy the URLs starting from the post where you want to start the capture, to the post where you want the capture to end from the CSV file
- Click the red Expand button, select the “Capture a list of posts (URLs) option, and click on the blue box
- Paste your URLs, click OK, and then Expand and capture!