Steps to Capture Facebook
Click here for an interactive walkthrough on capturing Facebook!
1. To capture Facebook, access the Page Vault Browser, type/paste the Facebook URL in the browser address bar, and press enter on your keyboard.
2. Once the page loads, it is important to log in to Facebook to access all available content. We suggest using an examiner account to prevent your personal information from appearing in the capture. See our help page on creating examiner accounts for more detail.
3. Once you’re logged in, click “Expand.”
4. Under Capture Type you will see two options: Standard and Post by Post.
- Standard: The resulting capture will include one PDF of the profile and a second PDF of the posts with expanded comments if you elect to capture comments.
- Post by Post: Not currently available
5. Select your desired settings under Capture Options.
6. Once you have the Expand settings selected, select the folder where you would like to save the capture. You can also change the default capture name, input a case matter ID, and add notes.
7. Click “Expand and Capture.”
Standard Capture Settings
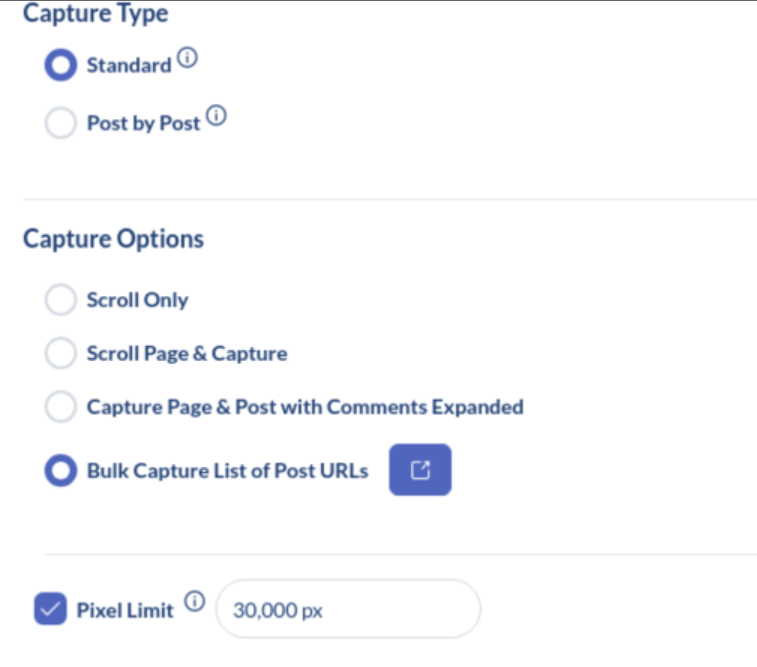
Under Capture Type, select “Standard.”
Under Capture Options, select one of the following:
- Scroll only: The automation will scroll to the bottom of the page without making any captures
- Scroll page & capture: Results in one PDF output of the current Facebook page, up to the pixel limit.
- Capture Page & Post with Comments Expanded: Results in a PDF capture of the current Facebook page, up to the pixel limit. Includes a second merged PDF of all individual posts with comments expanded.
- Bulk capture List of Post URLs: Paste a list of Post, Video, or Reels URLs tobe captured. This results in one single PDF capture per URL.
Next, you’ll see the “Pixel Limit.” The pixel limit stops the expansion process after a certain number of pixels load to prevent any extremely large profile from crashing the browser. We find that the browser functions best when limiting the expansion to 250,000 pixels at a time.
Note that if you unselect the pixel limit checkbox and the profile is very large, it may take several hours to complete or may even crash the Page Vault Browser.
If you need to capture a very large profile, please see our help page on how to break up large Facebook captures.
Once you have the Expand settings selected, select the folder where you would like to save the capture. You can also change the default capture name, input a case matter ID, and add notes. Then click “Expand and Capture.”